We use cookies and similar technologies to process personal information for the operation of our website, statistical analysis, and providing targeted advertising. We share information about your use of the site with our advertising partners who may further share it with additional parties. You may opt out of performance cookies here, and learn more about how we use cookies here”
Search history
Clear

- Topics
- Release Information
- X-Sign Quick guide
-
X-sign User manual
- Account (4)
- License (4)
-
Manager (15)
- Pairing the device with X-Sign Manager
- Creating the channel
- Scheduling the content by channel
- Scheduling the content by device
- Editing the device management structure
- Pushing Real-Time Message to your BenQ Smart Signage remotely
- Controlling the device remotely
- Updating device Player remotely
- Managing the calling system
- Creating an API table in X-Sign Manager
- Setting Verification
- Getting the system notification
- Updating device status immediately New
- Player report (proof-of-play) New
- Using Designer Express New
-
Designer (18)
- Creating a new project file in X-Sign Designer
- Uploading your content from Designer
- Creating content in X-Sign Designer
- Creating content from Designed Templates
- Creating a clock widget in X-Sign Designer
- Setting a weather widget
- Creating an Image or Video slideshow
- Rotating an image or video
- Generating a QR Code
- Adding a data connection
- Setting a timer widget
- Creating an API template using the demo kit
- Creating a TV Input source widget in X-Sign Designer
- Setting background music in X-Sign Designer
- Changing the playing order of pages
- Sealing a file in X-Sign Designer
- Opening an X-Sign 1.x project file
- Changing your language in X-Sign Designer
- Player (6)
- Local Delivery (3)
- Report (2)
- Video Wall (3)
- Interactive (Premium) (6)
- API (Premium) (1)
- GPL/LGPL Software Licenses Used by X-Sign
- X-Sign OpenAPI
X-Sign User Manual
In this section, we'll explain how to manage content in X-Sign, control the player, and set up playlists.
X-sign 2.0 / X-sign User manual / Designer
Creating a new project file in X-Sign Designer
2020 / 08 / 24
In X-Sign Designer you can create your own project with customizable features. Click here to watch the demonstration video.
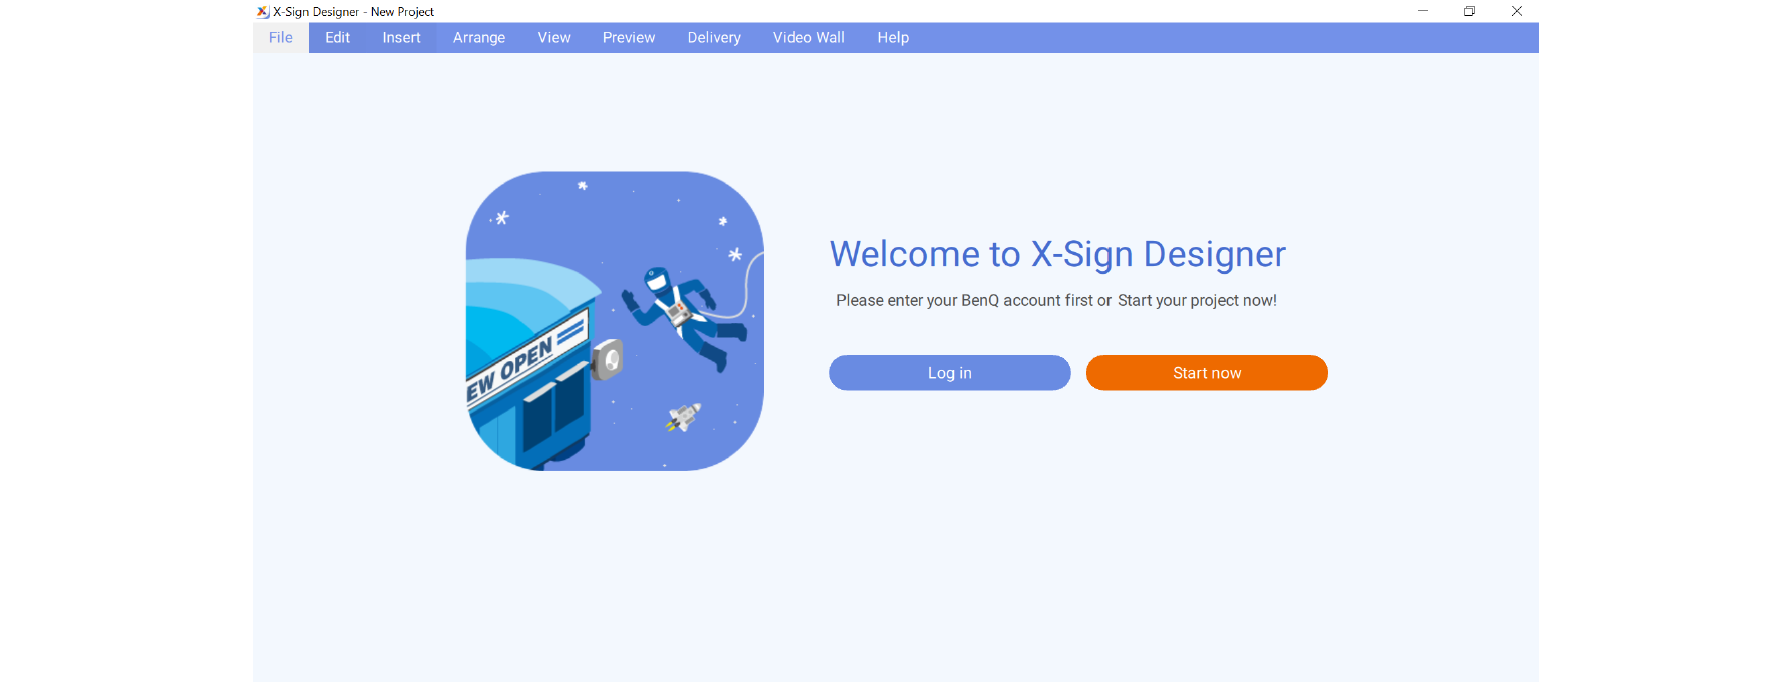
- By logging in the account, you can upload content on X-Sign Manager.
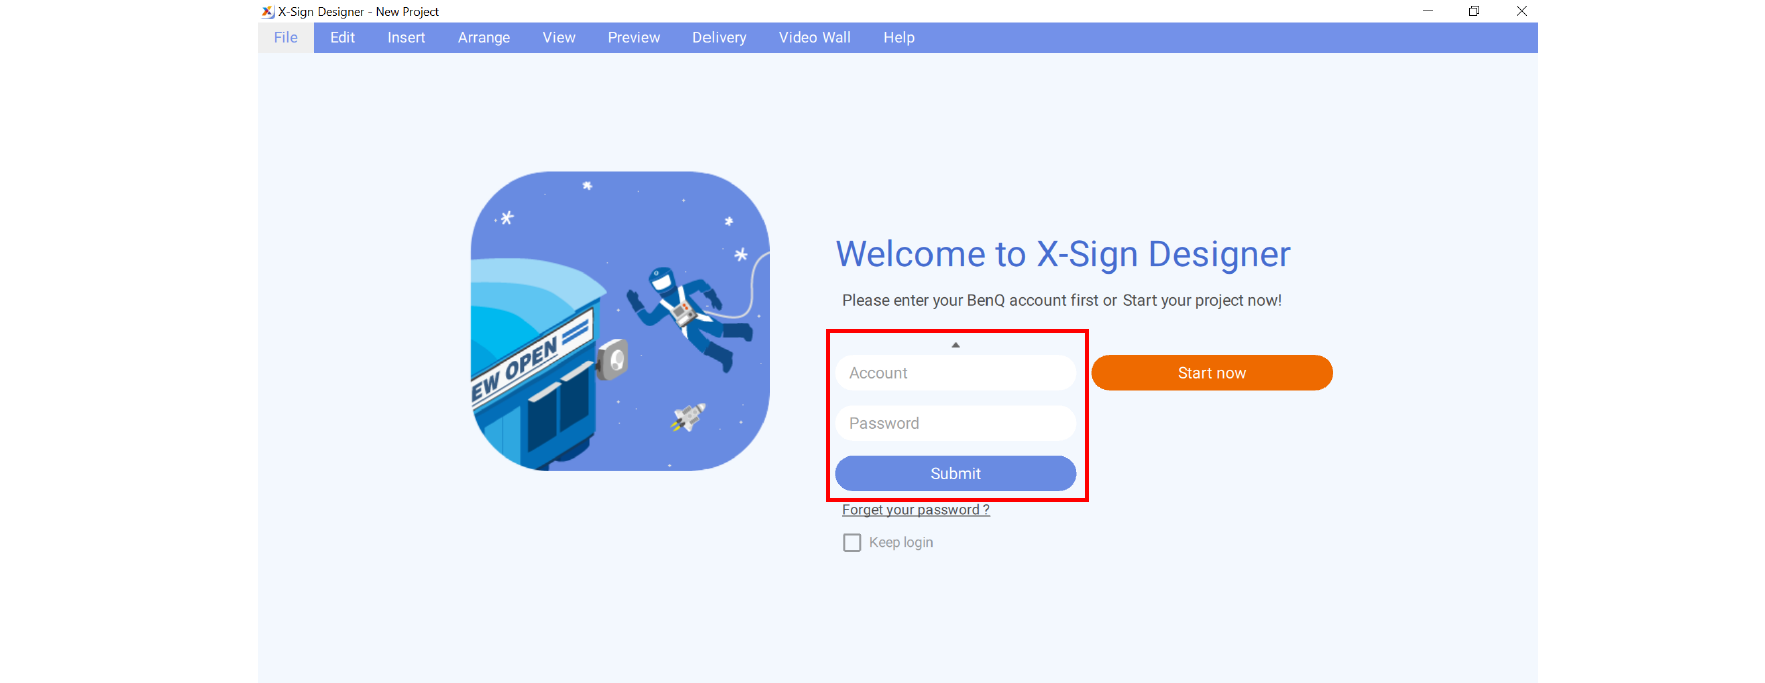
- You can also use X-Sign Designer without logging in the account by clicking Start now. You cannot upload content on X-Sign Manager only after logging in the account. Read Uploading your content from Designer for more imformation.
To create a new project file in X-Sign Designer:
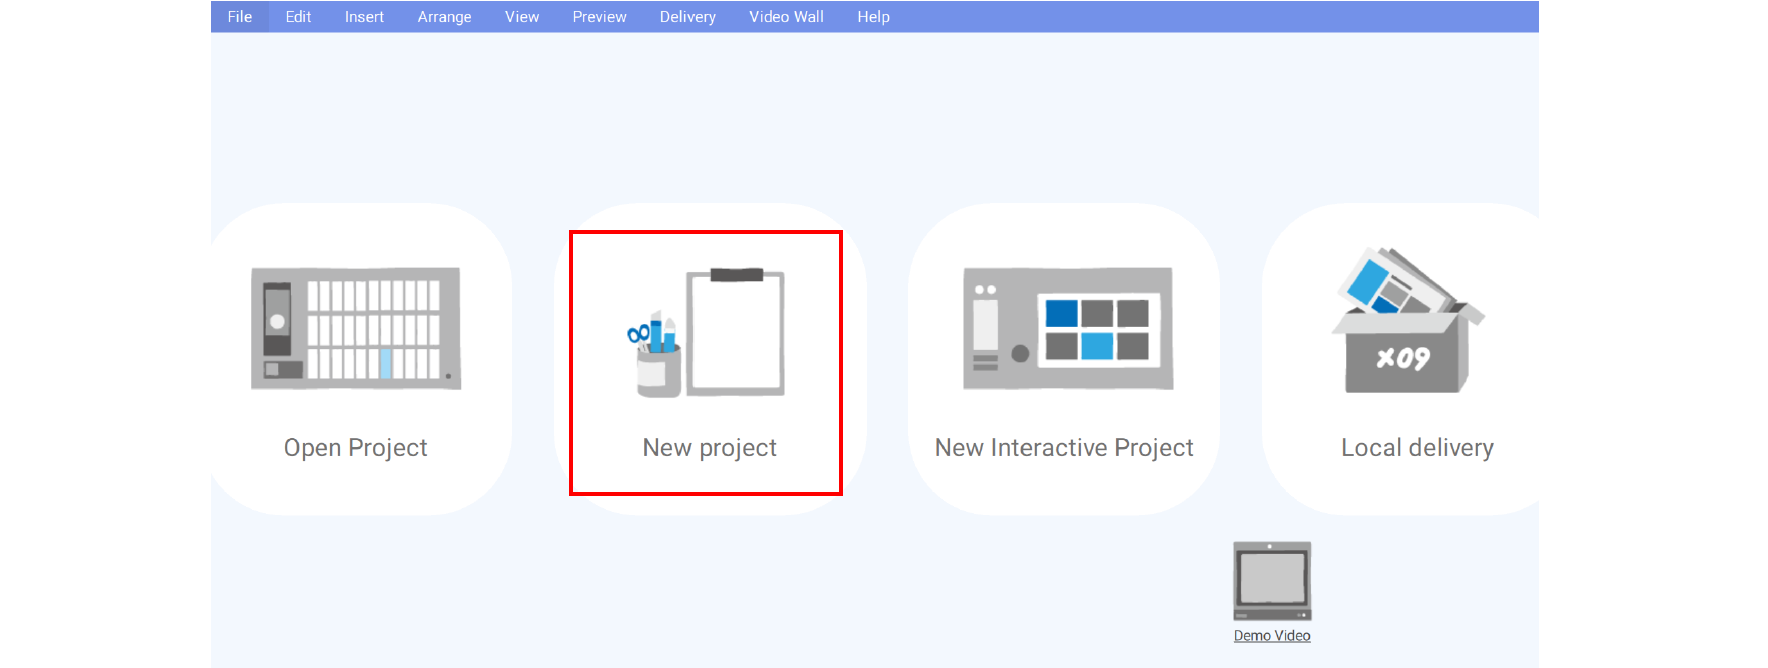
1. Launch the software and click New project.
2. To customize the project settings, configure the following items:
A. Project Location - Select the folder where your project will be saved.
B. Project Name - Create a name for your project.
C. Project Orientation and Resolution - Choose the layout and size of your project.
D. Panel Area - Adjust this setting for creating a Video Wall project.
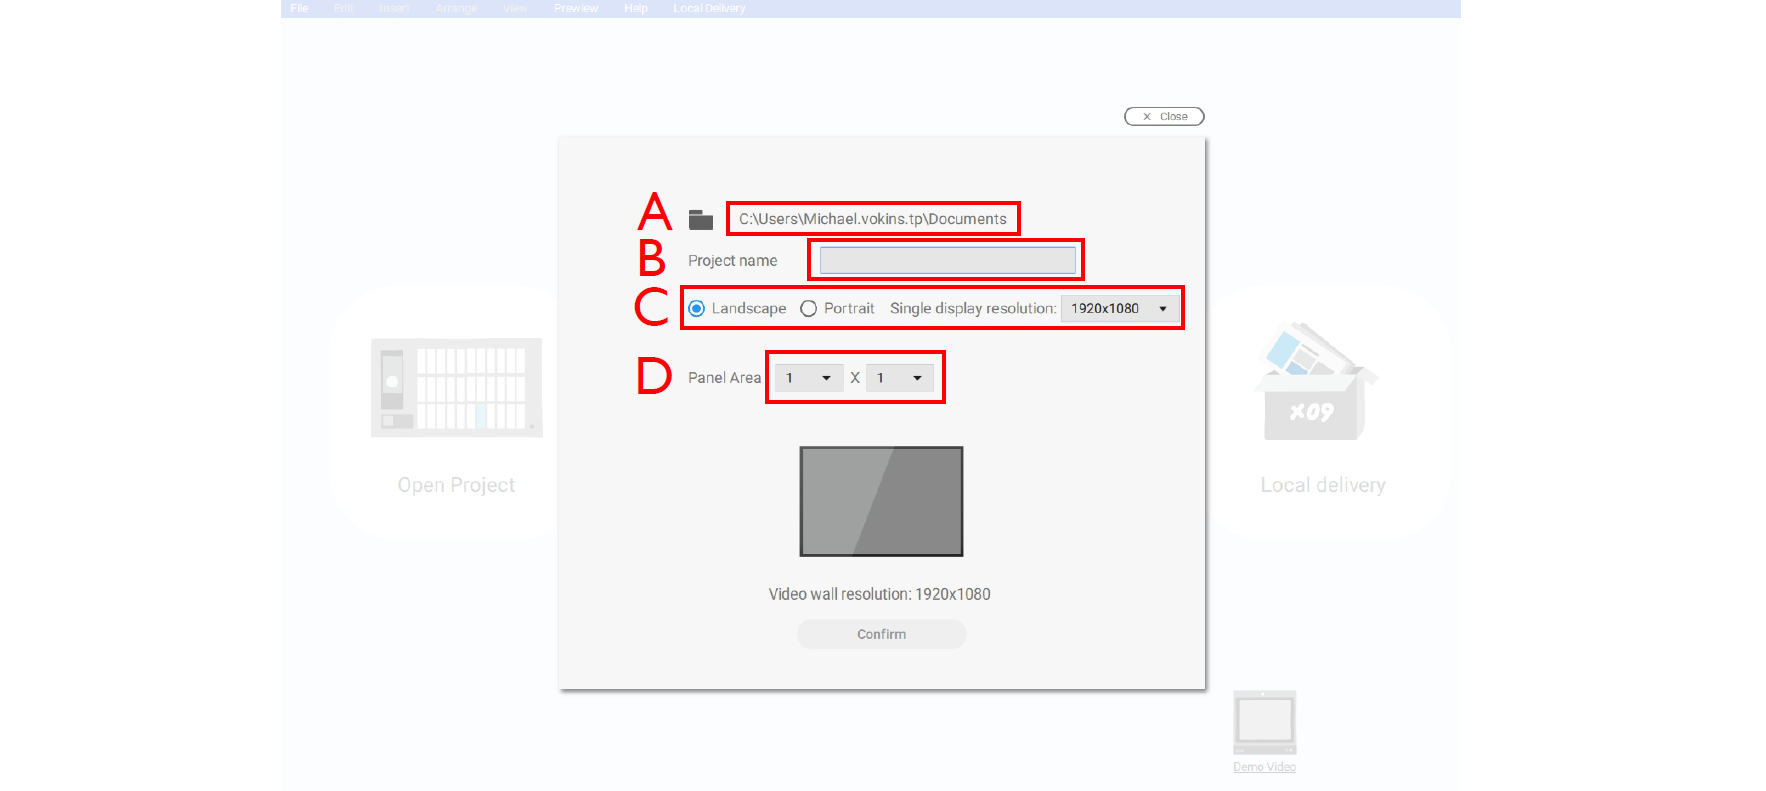
3. Select Confirm to create the new project file.
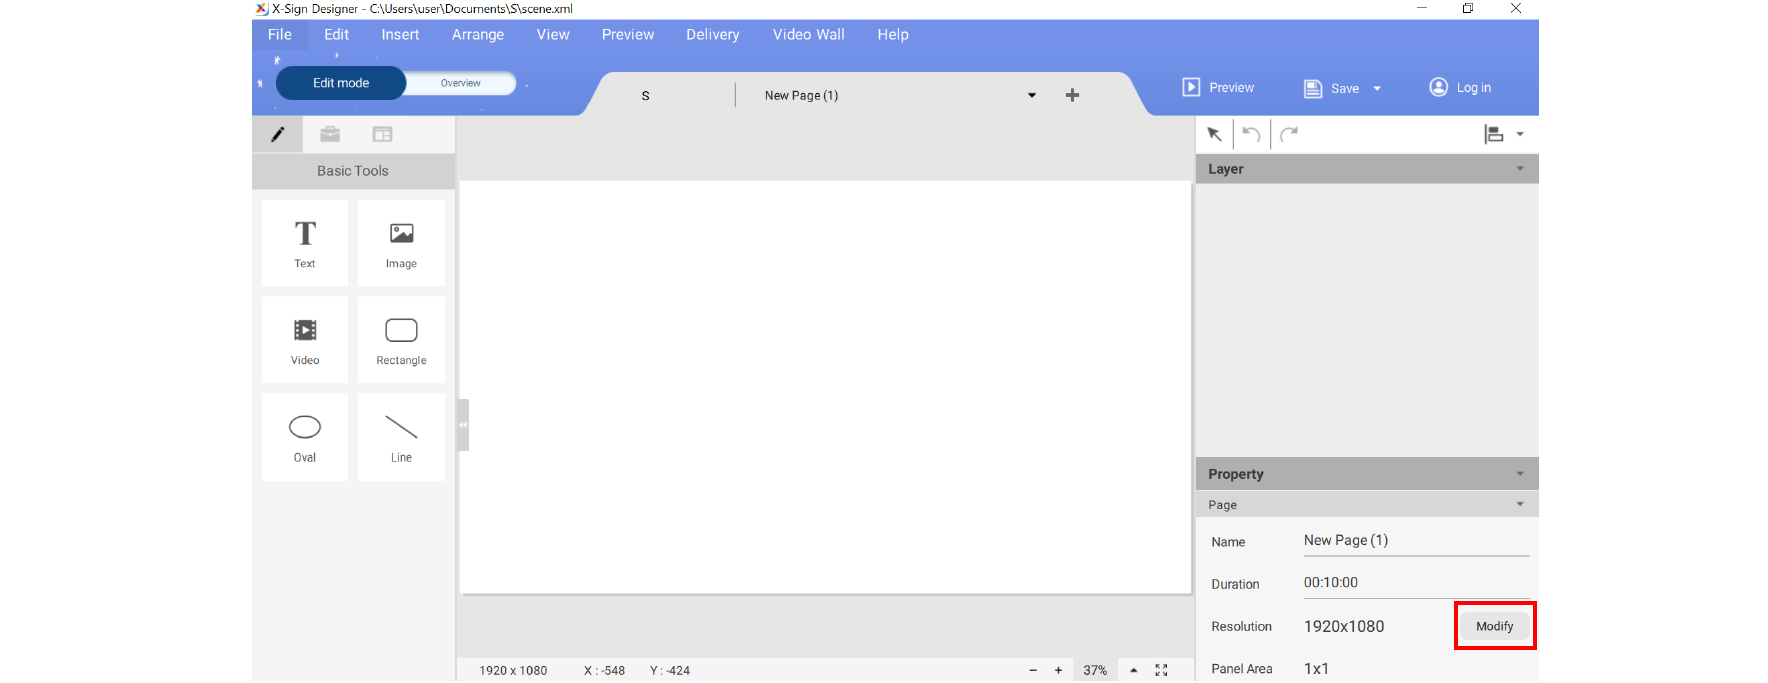
4. To adjust the project settings after a project has been created, click Modify in the Page panel.
5. To import media into your project, click the Image or Video button in the Basic Tool panel.
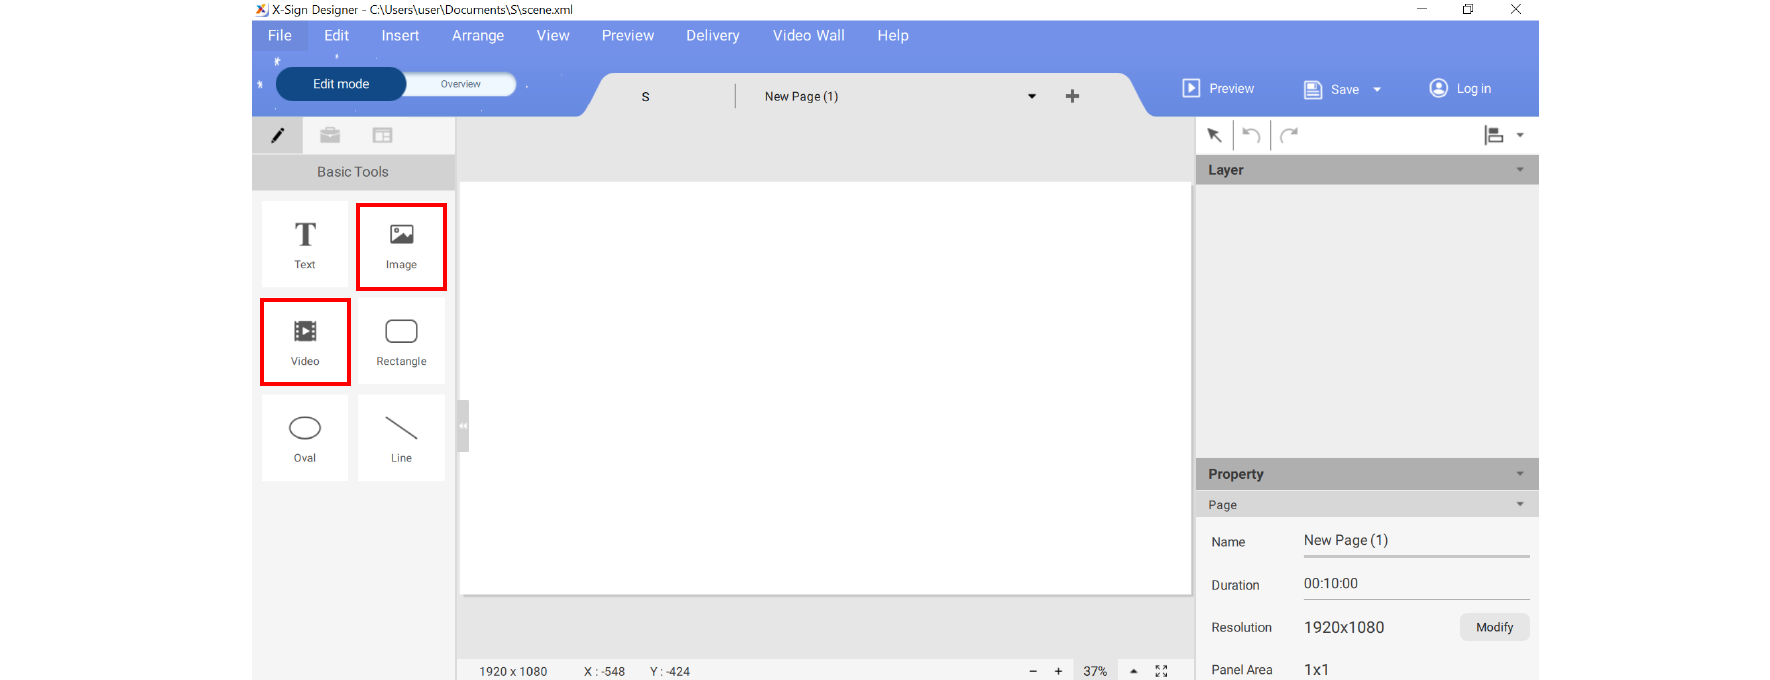
6. Select the media file to import and click Open.
Your Local Office
BenQ America Corp.
5741 Legacy Dr #210, Plano, TX 75024, USA
Tel: 888-818-5888
Fax: +1-214-473-9998
Follow Us
Ⓒ2020 BenQ - all rights reserved.
TOP