

So, you’ve considered all the options and have finally decided to purchase a laser TV. Before you get started though, there are some important pieces of knowledge you need to know regarding the planning and installation of a laser TV. In this article we’ve compiled some key pointers, based on valuable experience from users around the world, regarding the installation process to act as a tip-sheet that will assist you in your journey into the world of 100-inch visuals.
?$ResponsivePreset$&fmt=png-alpha)
One of the first things you need to know if you’re looking to install a laser TV with a 100-inch or larger image is whether your wall is big enough to accommodate the light resistant screen, traditional or electric, that corresponds to such an image. Below is a list of sizes for the most common light resistant screens on the market; as long as your wall is larger than the size listed for a given screen, you should be able to install it without any problems.
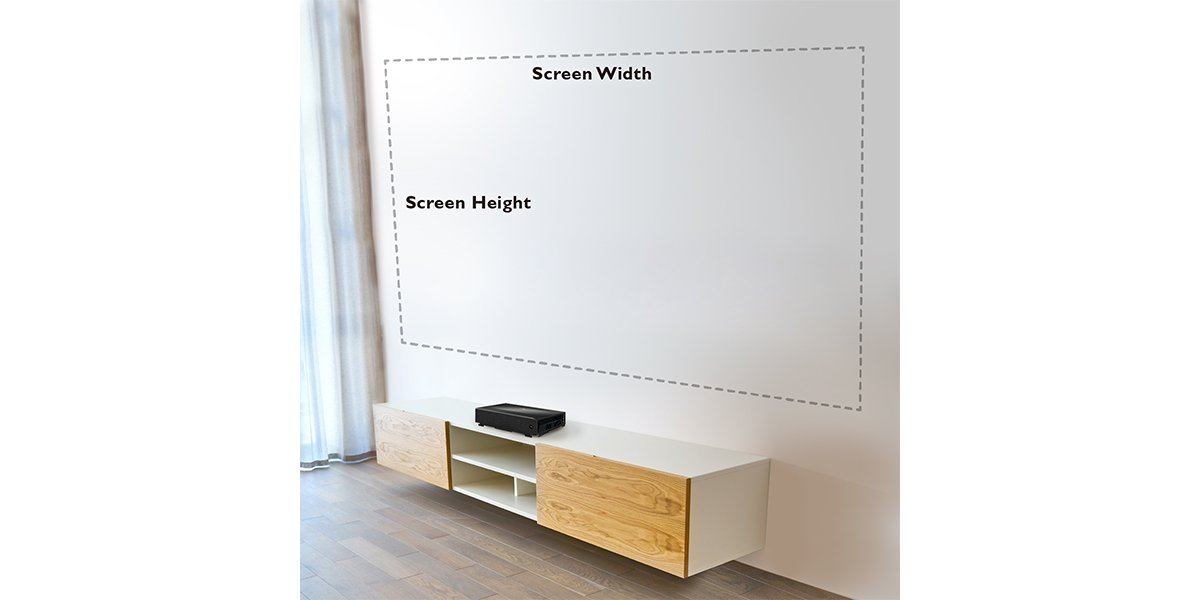
NOTE 1: The sizes shown above do not include the size of the screen borders. The average screen border is about 0.6 inches (1.5cm).
NOTE 2: Outside of checking the size, you should also check to see if the wall is straight. Any slant to the wall will affect the projected image.
Another option for users are electric light resistant screens, which can be placed either on the floor or a shelf and raised or lowered for use at the push of a button. With these types of screens, you won’t have to worry about whether your wall is perfectly straight, just install and enjoy.
Regardless of the brand or model of your laser TV, you will have to take into account both projector distance and height when installing.
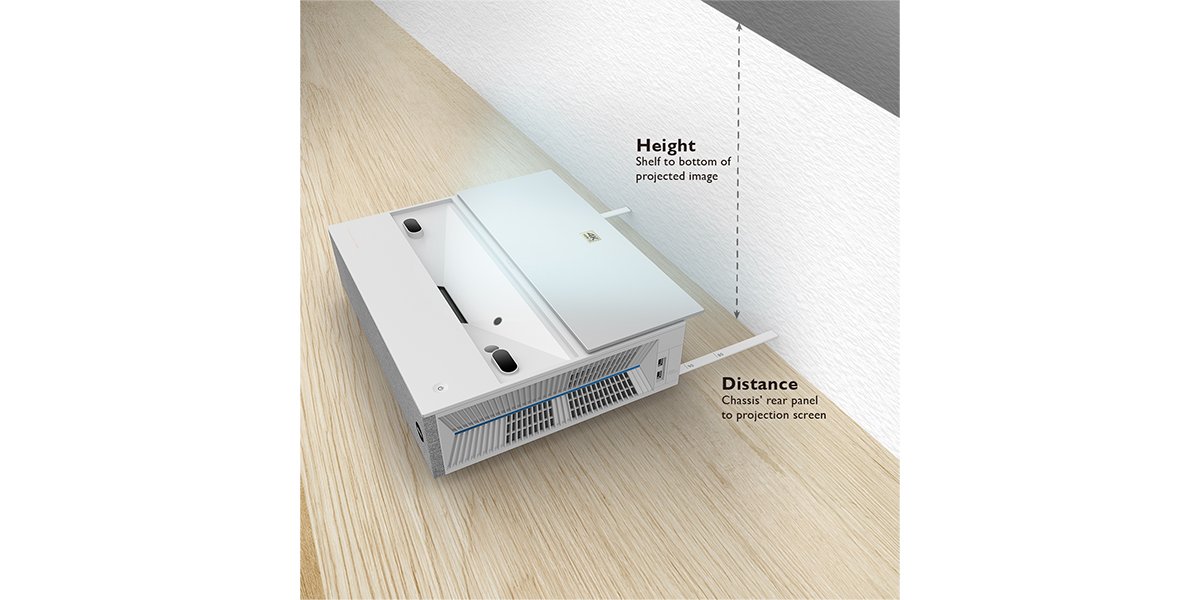
Laser TVs follow the same basic principle as traditional projectors: the longer the distance, the larger the image; the shorter the distance, the smaller the image.
Laser TVs tend to project at an upward angle, meaning the projected image will start from a point higher than the level of the projector. This also means that the farther away the projector is from the projection screen, the higher the projected image will be from the projector.
BenQ Laser TV Projector V7000i/V7050i Projector Distance and Height Comparison Table
| 16:9 Image Size | Projector Distance1 | Height2 |
16:9 Image Size 80” | Projector Distance1 4.7 in / 12.0 cm | Height2 12.2 in / 31.0 cm |
16:9 Image Size 90” | Projector Distance1 6.9 in / 17.6 cm | Height2 14.6 in / 37.1 cm |
16:9 Image Size 100” | Projector Distance1 8.7 in / 22.2 cm | Height2 15.8 in / 40.2 cm |
16:9 Image Size 120” | Projector Distance1 13 in / 33.1 cm | Height2 18.2 in / 46.3 cm |
1 This value indicates the distance between the projector’s rear panel and the projection screen. It does not include the thickness of the screen itself.
2 This value indicates the distance between the shelf and the bottom of the projected image.
Currently most laser TV sizes have a depth that roughly falls between 15.7 and 17.7 inches (40~45 cm). Given this, we suggest using a TV shelf with a depth between 19.7 and 27.6 inches (50~70 cm).
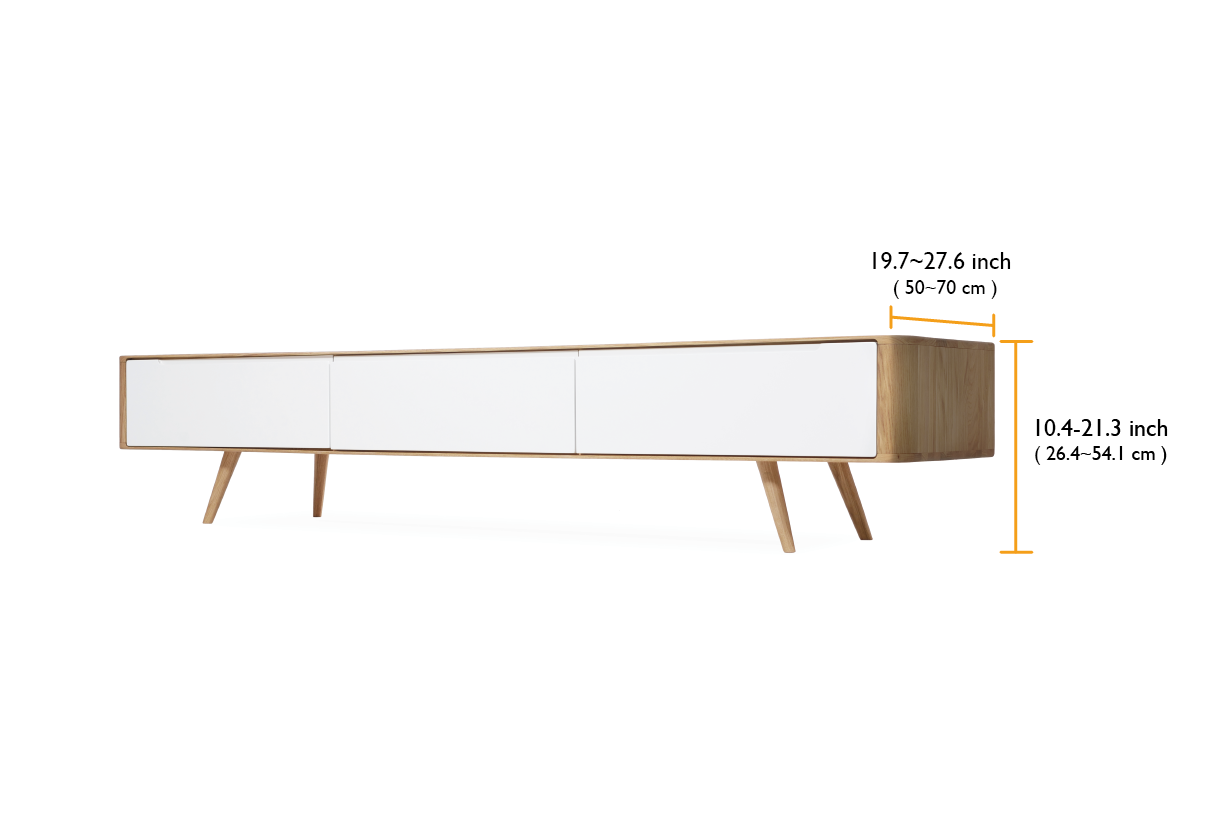
For custom wall mounted shelves, we suggest a depth of 23.6 to 27.6 inches (60~70 cm). This is for two main reasons: one, to leave some space for cable routing behind the projector, and two, so that when the laser TV is placed together with other devices (e.g. Blu-Ray player, PlayStation, etc.) the shelf space won’t look too overcrowded.
For store-bought shelves, we suggest a depth of 17.7 to 19.7 inches (45~50 cm) as well as placing the shelf roughly 3.9 to 7.9 inches (10~20 cm) away from the wall. This allows the Laser TV to be placed at the most ideal position.
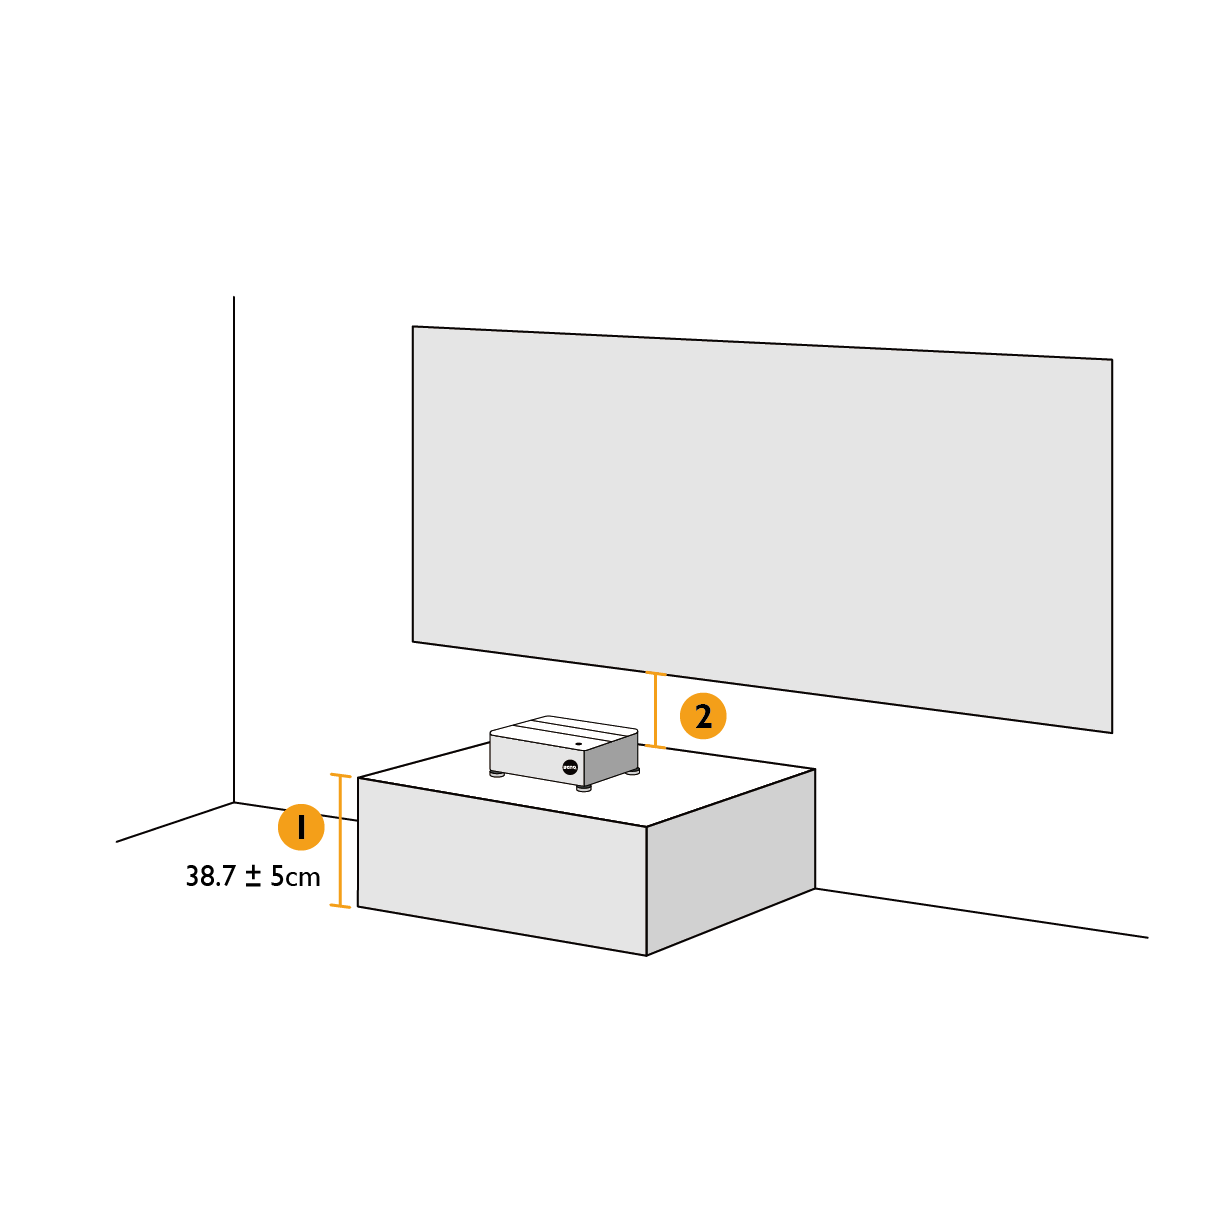
The following measurements are BenQ’s recommendations based on generalized conditions. The measurements applied should be adjusted based on actual conditions (including user height, the dimensions of the room, etc).
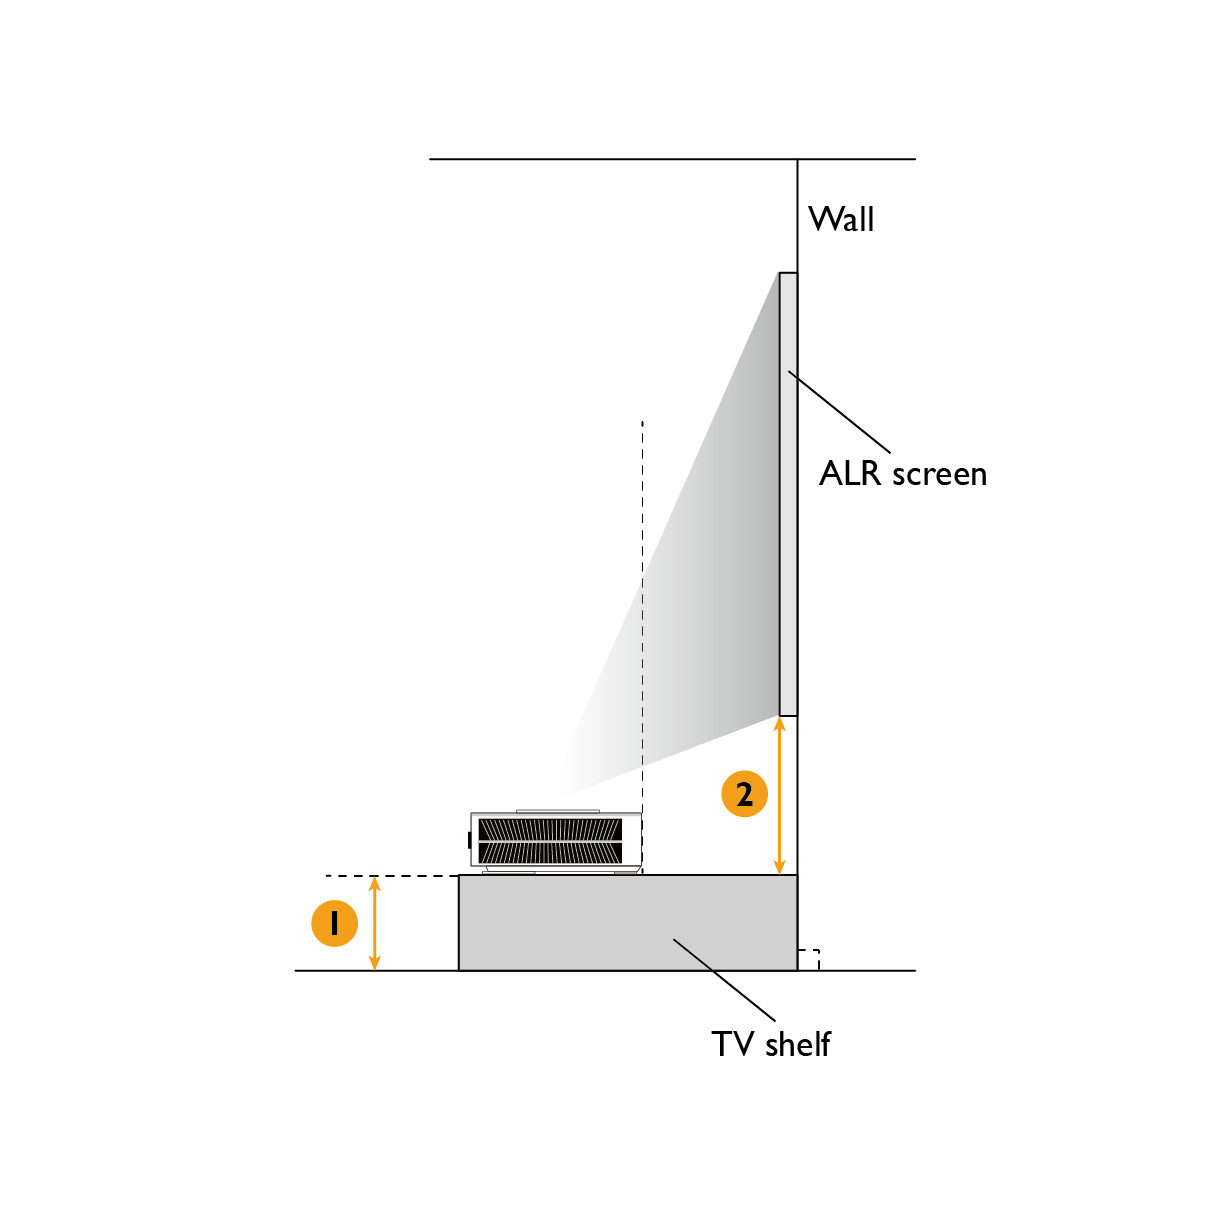
Projected Image Size |
Ideal Shelf Height (1) |
Ideal Distance Between Bottom of the Screen and Floor (1+2) |
Projected Image Size 80” | Ideal Shelf Height (1) 21.3 in / 54.1 cm | Ideal Distance Between Bottom of the Screen and Floor (1+2) 33.5 in / 85.1cm |
Projected Image Size 90” | Ideal Shelf Height (1) 17.7 in / 44.9 cm | Ideal Distance Between Bottom of the Screen and Floor (1+2) 32.3 in / 82.0 cm |
Projected Image Size 100” | Ideal Shelf Height (1) 15.2 in / 38.7 cm | Ideal Distance Between Bottom of the Screen and Floor (1+2) 31.0 in / 78.9 cm |
Projected Image Size 120” | Ideal Shelf Height (1) 10.4 in / 26.4 cm | Ideal Distance Between Bottom of the Screen and Floor (1+2) 28.6 in / 72.7 cm |
NOTE 1: All measurements have an acceptable range of ± 2 in / 5 cm
NOTE 2: Measurements will provide a projected image center at 43.3 in / 110 cm height.
Using the values listed above, you’ll be able to easily craft your own >100-inch laser TV home theater.
{{title}}
We will notify you when we have more.
We will send you an email once the product become available.Your email will not be shared with anyone else.
Sorry, our store is currently down for maintenance.We should be back shortly. Thank you for your patience!
